
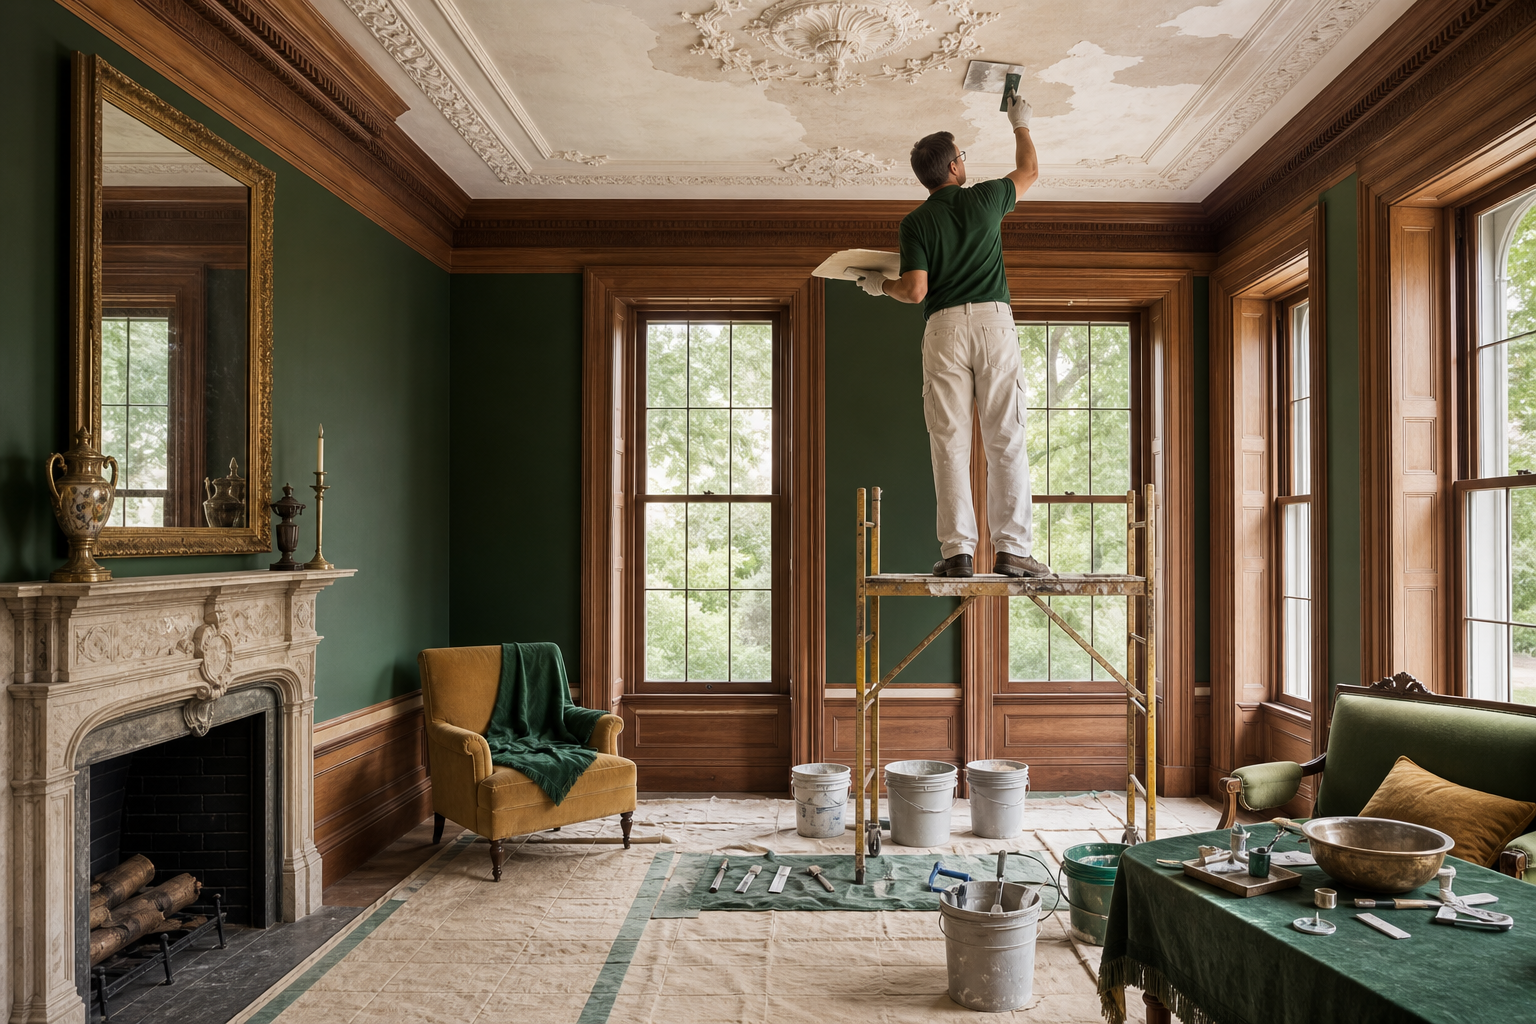
Historic plaster repair begins with a careful decision: what can be saved, what must be stabilized, and what should be replaced only when repair is no longer practical. In older Virginia homes, plaster walls and ceilings are more than a flat surface for paint. They help define room proportions, trim reveals, ceiling lines, decorative details, and the feeling of the house itself.
At Commonwealth Contractors, we work with homeowners in Charlottesville and across Virginia on custom renovations, additions, and historic building renovation projects where old materials need to be treated with care. If you have questions while evaluating plaster restoration in your home, you can reach out to our team for guidance before intrusive work begins.
Historic plaster repair should start with a condition assessment, not demolition
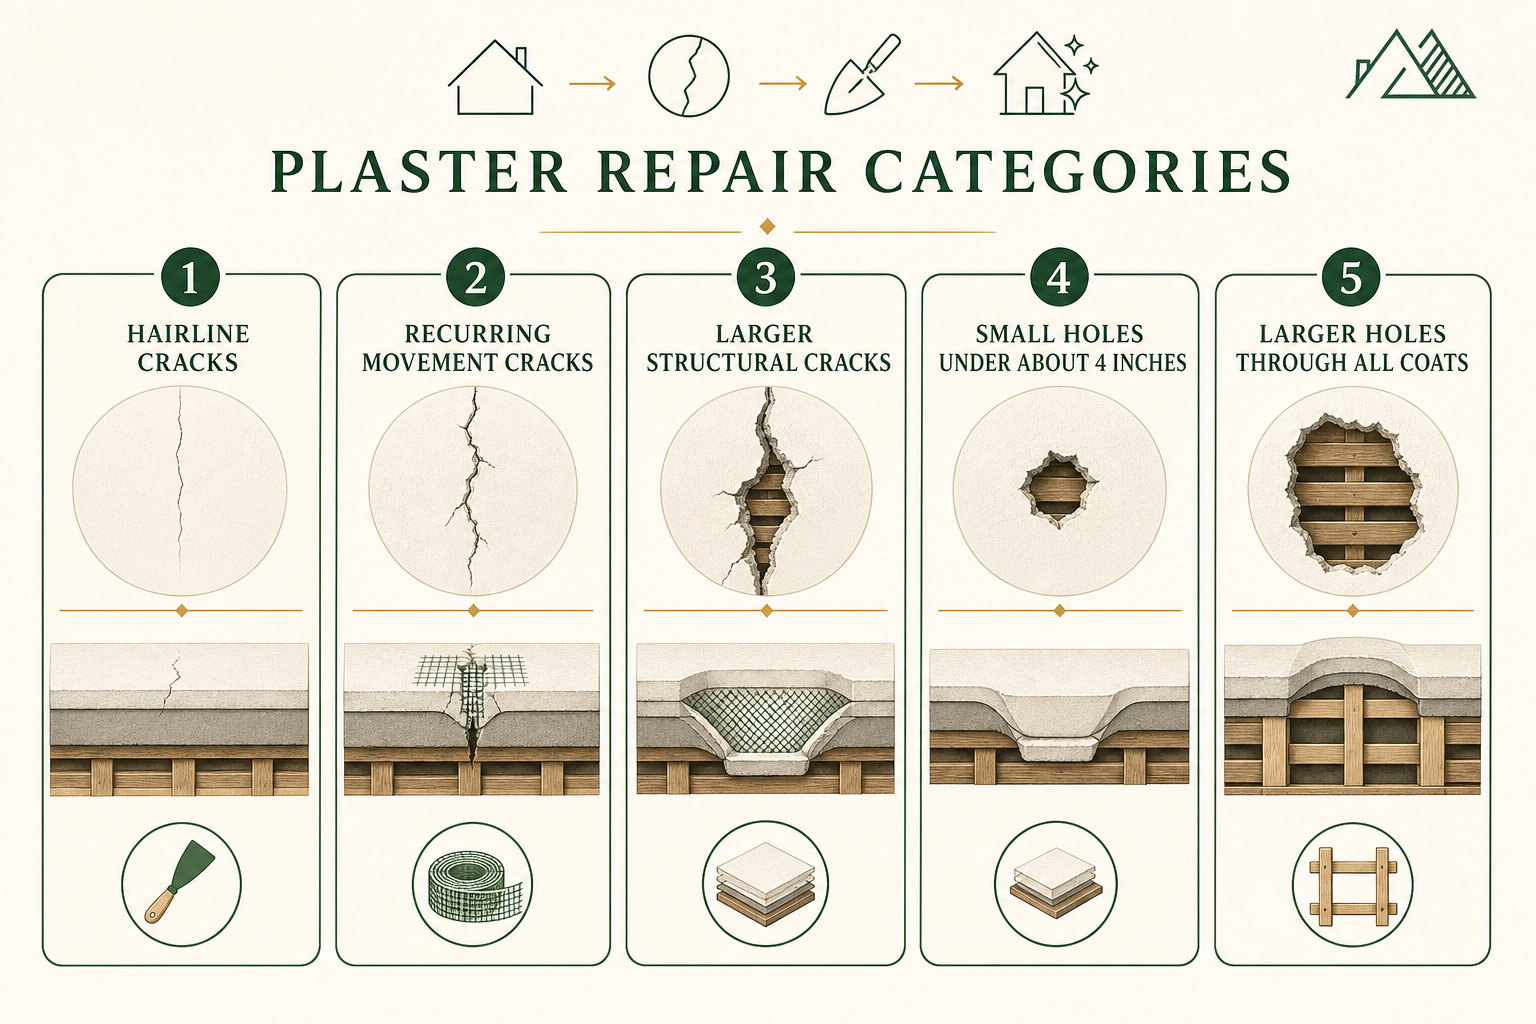
The first step in old house wall repair is understanding why the plaster is failing. Patching a crack without addressing moisture, movement, or loose lath may make the wall look better for a short time, but the damage is likely to return. A good assessment separates cosmetic cracking from structural movement, key failure, dampness, and incompatible earlier repairs.
The National Park Service guidance on historic flat plaster repair recommends identifying structural, moisture, workmanship, and curing problems before deciding whether to patch, stabilize, or replace plaster. That diagnosis drives the repair method.
Crack patterns often point to the cause of failure
Hairline cracks in otherwise firm plaster are usually cosmetic. They can often be filled, sanded, primed, and painted. Wider cracks, diagonal cracks from openings, or cracks that reopen seasonally deserve closer attention because they may reflect framing movement, settlement, lath movement, or changes in humidity.
Ceiling deflection, sagging, and bowing are especially important to evaluate. Historic plaster is held to wood or metal lath by plaster keys that mushroom through the lath gaps. When keys break, gravity can pull a ceiling downward even if the face of the plaster still appears mostly intact.
Moisture also leaves recognizable signs. Bubbling, staining, efflorescence, loose finish coats, or soft plaster near chimneys, exterior walls, roof-wall intersections, bathrooms, and laundry areas usually indicate that water must be managed before finish repair begins.
The plaster system and thickness influence the repair method
Not all historic plaster is the same. Traditional three-coat plaster over wood or metal lath often includes a scratch coat, brown coat, and thin lime finish coat. Early twentieth-century gypsum rock lath systems used plaster over gypsum board lath and have different thickness and bonding characteristics.
Identifying whether the existing plaster is lime, gypsum, or a combination helps determine compatible patching materials. It also helps preserve trim reveals. If a replacement area is too thin or too thick, window casings, door trim, baseboards, and built-ins can suddenly look wrong even if the plaster surface itself is smooth.
Loose plaster can often be stabilized before replacement is considered
Many homeowners assume that sagging or cracked plaster must be removed. In many cases, the better preservation approach is to stabilize the original material. This is especially true when the plaster is close to historic trim, ornamental cornices, medallions, decorative paint, or old wallpaper that would be damaged by broad demolition.
Stabilization depends on the condition of the lath and the remaining keys. If surrounding plaster is firm and lath is sound, targeted reattachment can save large areas. If the lath is rotted, rusted, or too weak to carry additional load, selective replacement may be safer.
Plaster washers can reattach sagging walls and ceilings
One common stabilization method uses plaster washers and screws. The washers spread pressure across the plaster face while screws draw the loose section back toward the lath or framing. After the plaster is secured, cracks and washer locations are covered with fiberglass mesh tape and skim-coated to create a continuous surface.
This approach is useful where a ceiling has dropped slightly but has not failed completely. It preserves original plaster, limits dust, and reduces the risk of damaging nearby architectural details. It is not a cure for plaster that is soft, friable, or detached across a broad area with failed lath.
Re-keying from above can preserve important finished surfaces
Where the back of the lath is accessible from an attic or from above, wet re-keying can rebuild the bond from the hidden side. The loose plaster is braced from below, the lath is dampened, and a fluid plaster mix is applied from behind so it flows into the voids between the lath and plaster.
Reinforcing material such as plaster-soaked jute scrim can then be laid across the lath backs while the first layer remains damp. This distributes loads and recreates broken keys without disturbing the finished room side. The method is most appropriate when the lath is still sound enough to support the repair.
Adhesive injection is reserved for high-value plaster finishes
For decorated surfaces, conservators may use adhesive injection to reattach delaminated plaster. Small holes are drilled through the plaster face or through the lath from behind, an acrylic adhesive mixture is injected, and the area is braced while the adhesive cures.
This technique is typically reserved for significant painted ceilings, murals, historic wallpapers, and ornamental work where maximum retention of original material is the goal. For routine flat plaster, mechanical stabilization, re-keying, over-lathing, or localized patching are more common.
Patching cracks and holes requires matching depth, movement, and material
Good plaster restoration is not just filling a gap. The patch must respond to the size of the damage, the cause of the failure, and the plaster assembly around it. A small finish defect may need only surface work, while a deep hole through all coats may require rebuilding the plaster in layers.
Before choosing a patching method, the surrounding plaster should be tested for soundness. A patch bonded to loose edges will crack or fall away. Likewise, a patch installed over a damp base or active structural movement will not last.
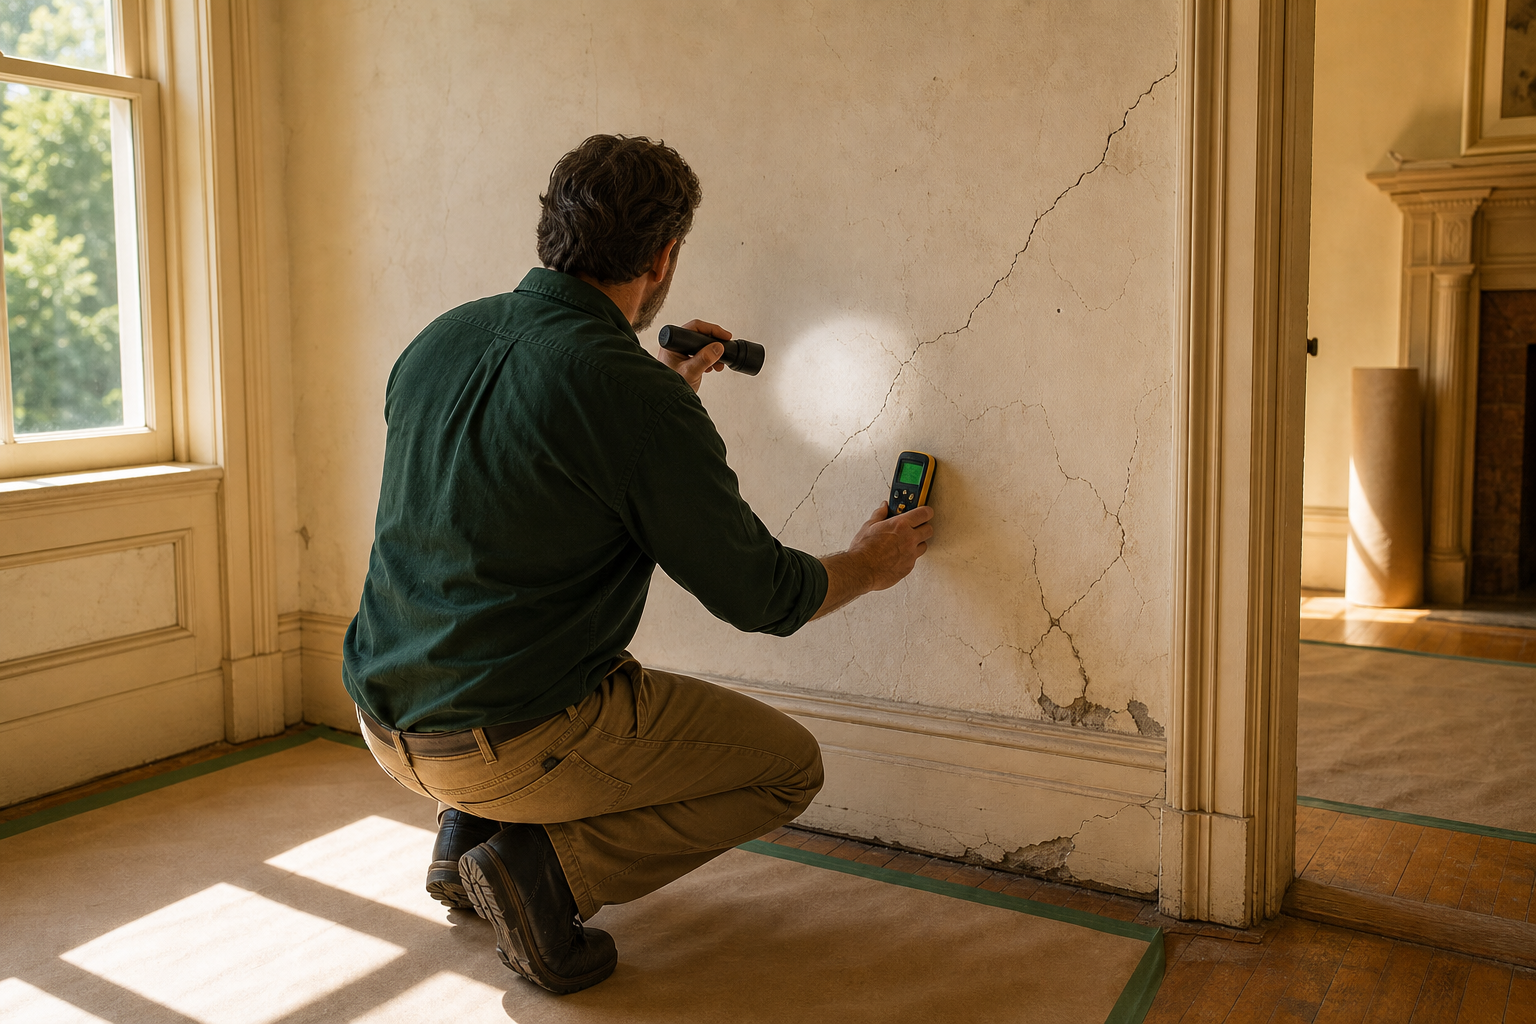
Several common repair categories help guide the work:
Hairline cracks in sound plaster: These can often be filled with appropriate joint compound or patching plaster, sanded, primed, and painted.
Recurring cracks from movement: These may need to be slightly widened, filled, bridged with fiberglass mesh tape, and built up with multiple skim coats.
Larger structural cracks after movement has stopped: These may require removing plaster on both sides of the crack down to the lath, adding metal lath, and rebuilding the area in three coats.
Small holes under about 4 inches: These are usually repaired in two applications, with a base coat set below the finish level and a finish coat brought flush.
Larger holes through all coats: These often require cleaning loose material, securing lath, dampening or bonding the substrate, adding expanded metal lath, and applying three stepped coats.
One-coat patches often dish and show under paint unless the original plaster was itself a single-coat system. Some early Virginia houses have one-coat lime and hair plaster over split lath, and those repairs should be compatible with that original system.
Traditional plaster replication depends on lime, gypsum, sand, hair, and texture
Historic plaster repair becomes most visible when the new work fails to match the old. Even a technically sound patch can look wrong if it is too flat, too smooth, too hard, or too different in texture. The goal is not to erase every irregularity, but to make the repair belong to the room.
Traditional lime plaster used lime putty mixed with sand, animal hair, and water for base coats. Finish coats used more lime, little or no aggregate, and no fiber. Later systems often used gypsum in base coats for faster setting while retaining lime-gauged finish coats.
Compatible mixes help old and new plaster move together
Repair mixes should be physically and chemically compatible with the existing plaster. Early lime-only systems may call for lime-sand-hair base coats and lime-gauged finishes. Many early twentieth-century houses may be better matched with gypsum-sand base coats and gauged lime finish coats.
Using a repair material that is too rigid, too thin, or poorly bonded can create future cracking. Proper thickness also matters. Minimum plaster thickness over wood lath, metal lath, masonry, or rock lath should be respected so the patch is not weak or visually recessed.
Texture matching should be tested before a full-room skim coat
Finish texture is created through aggregate size, plaster richness, troweling pressure, and finishing technique. Historic finishes may be smooth, floated, stippled, broomed, swirled, or polished with marble-dust-rich hard finishes.
Small samples and mock-ups are valuable. A test patch can be reviewed under both natural and artificial light. This is especially helpful in rooms where one wall receives strong daylight, because texture differences often become more visible as light rakes across the surface.
Selective replacement is appropriate when plaster cannot be safely saved
Preservation favors repair where feasible, but some plaster is too deteriorated to stabilize. Long-term moisture exposure, rotted lath, rusted metal lath, chronic structural failure, or widespread key loss can make replacement necessary. The key is to remove only what must be removed and protect what remains.
When demolition is unavoidable, it should be controlled and minimally invasive. Adjacent rooms can be damaged by shock and vibration if plaster is torn out aggressively. Small, careful removal helps protect partitions, trim, floors, mantels, staircases, and decorative finishes.
After damaged plaster is removed, the exposed substrate determines the next step. Each option affects cost, durability, thickness, and historic character. Homeowners should understand those trade-offs before work begins.
Reuse old wood lath where it is sound: This preserves historic fabric, but lath must be re-nailed and thoroughly dampened or treated with bonding agents before new plaster is applied.
Install expanded metal lath over existing wood lath: This retains early lath while relying on metal lath for stronger keying and stability.
Use new galvanized metal lath where lath is missing or compromised: This can provide reliable long-term keying when the original substrate cannot perform.
Use rock lath or veneer plaster where depth is limited: These systems can help maintain trim reveals when traditional three-coat depth is not practical.
Use gypsum board only where preservation standards allow: Flat walls and ceilings that are not highly ornamented may accept replacement if character-defining spaces and details are not compromised.
Veneer plaster can be a useful substitute when the original plaster is beyond saving but a traditional plaster appearance is still desired. It uses gypsum-core panels with a special bonding paper and a thin veneer plaster coat, with the option of a lime-gauged finish coat to better approximate hand-troweled historic surfaces.
This is often where an experienced historic renovation team matters. Commonwealth Contractors approaches historic building renovation with attention to existing fabric, trim depth, room proportions, and the sequence of work so that necessary replacement does not become unnecessary loss.
Electrical, plumbing, and HVAC penetrations should be planned before plaster work begins
Modern living often requires new wiring, plumbing, ducts, grilles, outlets, and controls. In historic houses, these upgrades can cause more plaster damage than the repair work itself if they are not coordinated early. Penetrations should be planned around the most important walls, ceilings, and decorative features.
Historic preservation guidance for mechanical work emphasizes routing systems through secondary spaces, attics, basements, closets, existing chases, abandoned chimneys, or furred spaces where possible. The GSA HVAC preservation guidelines recommend minimizing penetrations of ornamental surfaces and locating grilles and diffusers as inconspicuously as possible.
Service routes should avoid character-defining plaster where possible
Principal rooms such as parlors, stair halls, and formal dining rooms often contain the plaster surfaces most worth protecting. Less significant or previously altered spaces may be better locations for vertical runs, access panels, and mechanical distribution.
When a penetration cannot be avoided, smaller controlled openings are better than broad exploratory cuts. Careful drilling, coring, and layout can limit damage, simplify patching, and keep devices aligned with architectural features rather than scattered across historic walls.
Firestopping and air sealing are part of responsible plaster repair
Penetrations through plaster assemblies must also meet modern performance needs. Firestopping guidance distinguishes between through penetrations and membrane penetrations, and each condition requires appropriate rated assemblies. Generic fillers or old plaster stuffed around pipes should not be treated as a substitute for tested firestopping systems.
The firestopping guidance for penetrations explains that assemblies are rated for fire resistance and, where applicable, temperature performance. At the same time, penetrations should be sealed at the air barrier so pipes, conduits, and ducts do not become pathways for drafts, moisture-laden air, or noise.
Building science guidance on sealing air barrier penetrations emphasizes caulks or flexible gaskets that keep the plaster plane airtight while allowing small movements. This is especially relevant when older walls are upgraded for comfort and energy performance.
Moisture and structural movement must be solved for repairs to last
Repeated plaster failure usually has a source. If that source is ignored, new plaster may crack, blister, stain, or detach. Moisture and movement are the two most common reasons that a repaired historic wall fails again.
Moisture may come from roof leaks, gutter and downspout problems, poor ground drainage, rising damp, splash-back from hard paving, plumbing leaks, or damp masonry. When moisture carries salts through masonry, efflorescence can form at the plaster surface and cause bubbling or detachment.
Repairing the plaster before the wall dries is a mistake. Wet or salt-laden bases can cause stains and failures to reappear. In severe situations, damaged plaster may need to be removed so masonry can dry before replastering begins.
Exterior water management protects interior plaster
In brick or stone houses, exterior conditions often determine interior plaster performance. Roofs, flashing, gutters, downspouts, masonry pointing, grading, and drainage all affect whether moisture reaches interior finishes. The National Park Service guidance on small and medium building exteriors emphasizes maintenance of exterior envelopes as part of preservation.
Interior sealants are not a long-term fix for exterior water problems. Keeping masonry dry, moving water away from foundations, and correcting leaks gives the plaster repair a chance to perform.
Active movement should be evaluated before cosmetic repairs
Structural movement can show as diagonal cracks from door and window corners, ceiling deflection, cracks following lath lines, or recurring cracks that open and close seasonally. Undersized beams, overloading, missing headers, settlement, expansive soils, vibration, and humidity-related lath movement can all contribute.
If movement has stopped and the building is not endangered, a crack may be treated cosmetically after evaluation. If movement is active or widening, structural reinforcement or load correction should come before major plaster investment. Monitoring crack progression over several seasons can help determine whether the issue is stable.
Finish matching includes skim coats, paint, trim protection, and preservation choices
The final appearance of historic plaster repair depends on more than the plaster patch. Skim coats, paint systems, trim protection, and decisions about what not to alter all influence whether the renovated room still reads as historic.
Sound but uneven plaster may not need aggressive replastering. In some cases, canvassing, fabric lining, or heavy lining paper can create a stable base for paint or wallpaper while preserving old plaster contours. This approach is best used only after active cracks and moisture problems have been addressed.
New plaster should cure before painting
New gypsum-lime plaster should be allowed to cure before paint is applied. NPS guidance recommends allowing 2 to 3 weeks of curing, confirming dryness, and using an alkaline-resistant primer formulated for new plaster before compatible topcoats are applied.
Breathable paint systems are often favored on old lime-rich plaster because vapor-tight coatings can trap moisture and contribute to blistering or spalling. Where decorative schemes are uncovered, homeowners may choose conservation or reinterpretation rather than immediately covering the surface with opaque modern paint.
Trim, masonry, floors, and ornamental plaster need protection during work
Preservation guidance for historic interiors stresses documentation and protection before intrusive work. The National Park Service Preservation Brief 18 identifies plaster walls, ceilings, cornices, decorative paint, wallpaper, trim, and room proportions as important character-defining interior features.
Before work begins, features to be preserved should be photographed, marked, and protected. Floors, stairs, mantels, wainscoting, baseboards, built-ins, door casings, window casings, masonry fireplaces, and ornamental plaster details should be shielded from dust, abrasion, splatter, vibration, and impact.
Removing plaster simply to expose brick or masonry is usually not a preservation-minded choice when the surface was historically intended to be plastered. Exposed substrates may be rough, poor quality, or visually inconsistent with the room’s original hierarchy of plaster, woodwork, and openings.
Qualified plaster restoration contractors should document, coordinate, and preserve
Historic plaster work is a skilled craft. Minor crack filling may be within reach for some homeowners, but re-keying, three-coat plastering, ornamental replication, finish matching, and complex ceiling stabilization call for professionals who understand old plaster systems.
A qualified contractor should be able to explain what failed, why it failed, and what repair options preserve the most material while still solving the problem. The discussion should include lath condition, plaster mix, repair thickness, texture, trim reveals, service penetrations, moisture sources, structural movement, dust control, and protection of historic features.
When interviewing a contractor for historic plaster repair, ask for clear project examples, not general assurances. The right team should be able to describe past work on houses of similar age, the difference between stabilization and replacement, and the implications of each approach for durability and historic character.
A strong scope of work reduces surprises during old house wall repair
Written scopes should identify areas of sound plaster, loose plaster, missing plaster, decorative features, planned penetrations, protection requirements, repair mixes, finish expectations, and sequencing. This level of documentation helps homeowners compare options and helps trades avoid unnecessary damage.
Coordination is especially important when plaster repair overlaps with HVAC, electrical, plumbing, insulation, or structural work. Rough-ins should be planned before final plaster consolidation and skim coats. Otherwise, newly restored walls may be cut open again.
Schedule a consult for historic plaster repair in Virginia
Renovating plaster walls and ceilings in a historic home is a balance of preservation, performance, and practical construction planning. The best results come from assessing the cause of damage, stabilizing original material where possible, patching with compatible methods, replacing selectively, planning service penetrations early, and matching finishes with care.
If you are planning plaster restoration, old house wall repair, or a larger historic renovation in Virginia, Commonwealth Contractors can help you evaluate the right path forward. Schedule a Consult through our contact page at https://www.commonwealthcontracts.com/contact-us or call (434) 218-0448.







.webp)
.webp)

.webp)


.webp)
.webp)

.webp)
%2520(1).webp)
%2520(2).webp)


.webp)
.webp)
.webp)
%2520(1).webp)
%2520(3)%2520(1).webp)
%2520(1)%2520(1).webp)
.webp)
%2520(1).webp)
%2520(2)%2520(1).webp)