
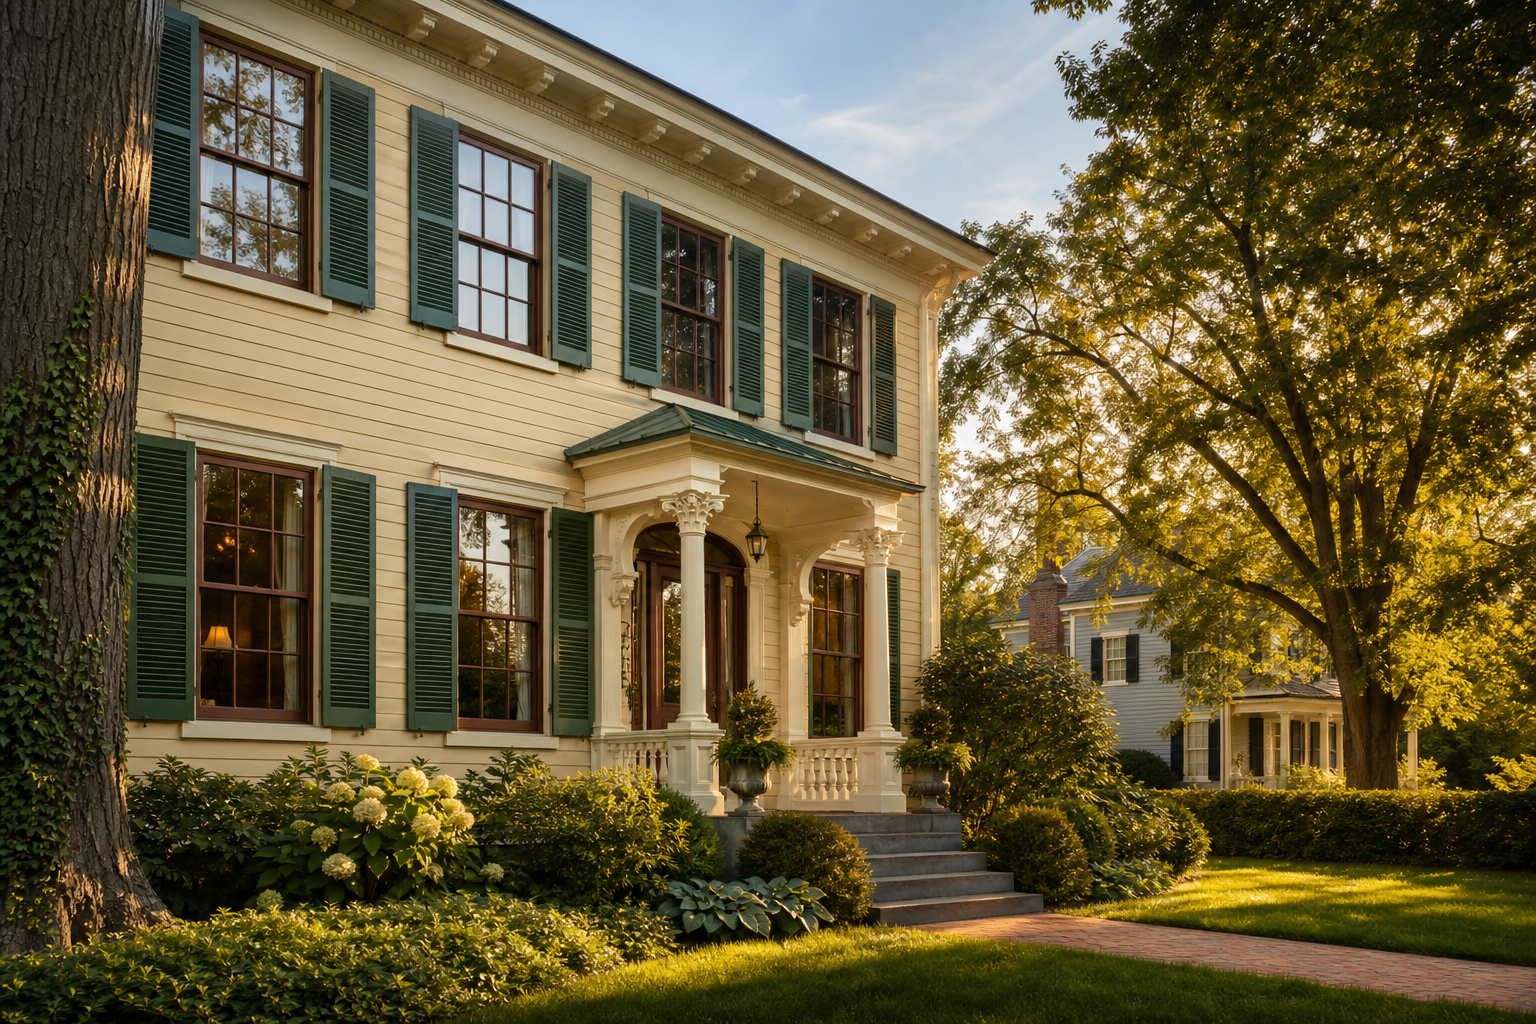
Improving energy efficiency in historic homes is not as simple as adding insulation, replacing windows, and installing new HVAC equipment. Older houses were built with different materials, different moisture behavior, and different ventilation patterns than newer homes. When upgrades are made without understanding those systems, comfort may improve briefly, but the building can suffer hidden damage.
The better path is careful sequencing. Start with information, reduce the biggest sources of energy loss first, preserve character-defining features, and make sure every change supports long-term durability. For a historic home renovation, the goal is not to make the house act like new construction. The goal is to improve comfort and performance while respecting the way the building was designed to function.
At Commonwealth Contractors, we work with homeowners in Charlottesville and throughout Virginia on custom homes, renovations, additions, and historic building renovation. Because many Virginia homes carry architectural and cultural value, we approach energy upgrades as both a construction challenge and a preservation responsibility. If you have questions about your home’s condition or potential renovation path, you can reach us at (434) 218-0448.
A formal energy audit should come before major upgrades in historic homes
The most important first step is not insulation or equipment replacement. It is a formal energy audit, ideally including blower door testing. An audit identifies where the house is actually losing energy, rather than relying on assumptions that may lead to unnecessary or damaging work.
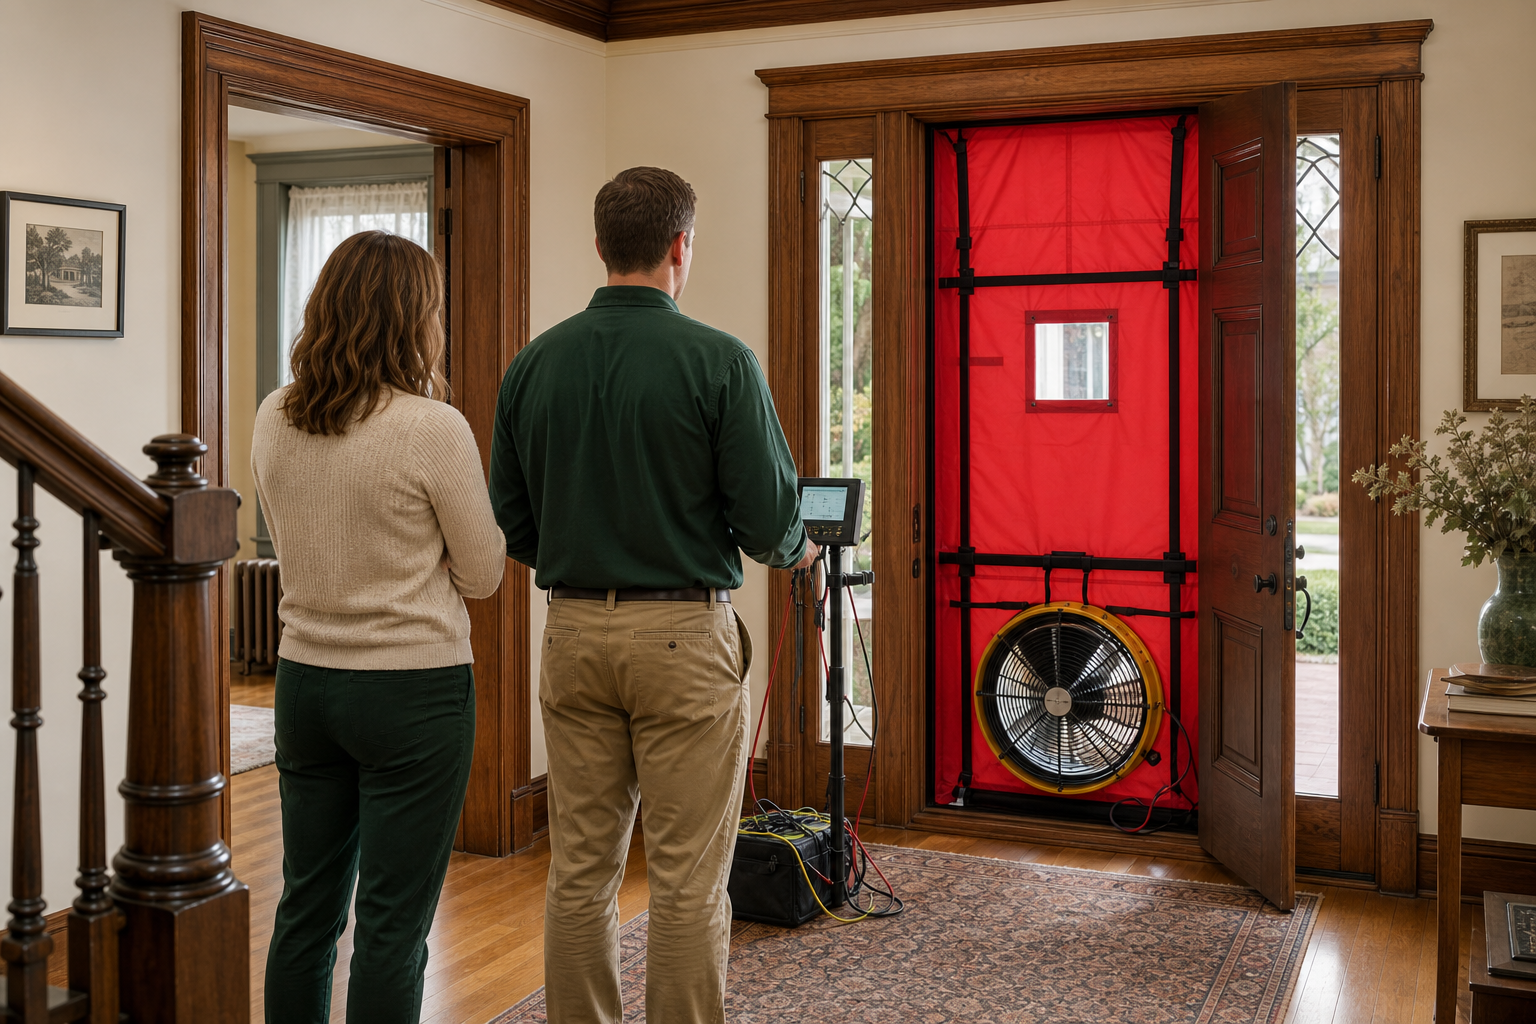
In historic homes, the largest leaks are often concentrated in a relatively small number of places. Attic penetrations, chimney chases, sill plate joints, unsealed basements, crawl spaces, window gaps, door gaps, and duct leaks can account for major heat loss. A blower door test pressurizes or depressurizes the home so those leakage points can be located and measured.
This matters because the least invasive repair may also be the most effective. Preservation Brief 3 recommends beginning with energy-saving measures that protect historic materials, including air-leak reduction, attic insulation, basement and crawlspace insulation, duct and pipe insulation, and operational improvements.
Energy upgrades should follow a least invasive first sequence
Historic homes often already include energy-conscious features, such as operable windows, shutters, awnings, thick walls, vents, and shaded openings. These features should be maintained and used before major structural interventions are considered. The National Park Service sustainability guidance emphasizes assessing existing energy-efficient characteristics and favoring reversible, low-impact changes.
A practical first phase often includes thermostat improvements, system maintenance, duct sealing, lighting upgrades, weatherstripping, and basic air sealing. These measures can improve comfort without removing plaster, altering window openings, or changing exterior appearance. Only after these steps should more intrusive work, such as wall insulation or major mechanical redesign, be evaluated.
For historic properties in Virginia, planning should also consider preservation standards, local review expectations, and potential tax credit requirements. When energy work is part of a certified historic rehabilitation, the design must support both performance and preservation.
Air sealing historic homes requires balance, not maximum tightness
Air sealing is usually one of the highest-value energy improvements in an old house. Drafts waste energy, create cold rooms, and make HVAC systems work harder. Yet historic homes should not be sealed without regard for moisture movement.
Older buildings often manage moisture through porous materials, air gaps, and natural drying. If every gap is sealed and ventilation is not addressed, moisture can accumulate inside assemblies. That can contribute to wood deterioration, mold, insect issues, and damage that may remain hidden until repairs become extensive.
The goal is controlled air leakage, not a completely sealed envelope. Blower door testing helps define the starting point and measure improvement. It also helps focus work where it will provide the most benefit with the least disturbance.
Priority air sealing areas are usually outside the most visible historic spaces
Many important leakage points are in unfinished or secondary areas, which makes them ideal for preservation-sensitive work. These areas can often be improved without changing millwork, plaster, masonry details, or original window profiles. That is why air sealing should be guided by investigation rather than broad demolition.
Before beginning, the project team should identify moisture concerns, confirm where air is moving, and consider how the home will be ventilated afterward. This approach helps avoid overcorrecting one problem and creating another. The most useful air sealing locations are often predictable, but each house still needs its own assessment.
Seal attic bypasses around wiring, plumbing, chimneys, and other penetrations where conditioned air escapes upward.
Address sill plate joints and the connection where the foundation meets the wood framing.
Seal cracks and gaps in foundations, masonry, crawl spaces, and basement areas where exterior air enters.
Use caulk or gaskets around electrical, plumbing, cable, and phone penetrations that create hidden leakage paths.
Weatherstrip doors and windows to reduce drafts while preserving original assemblies.
Seal duct leaks and insulate ducts where appropriate, especially when ducts pass through unconditioned areas.
Weatherstripping deserves particular attention because it can improve comfort while leaving historic windows and doors intact. Research cited by preservation organizations indicates that weatherstripping can account for up to 50% of a window’s energy performance. That makes it a strong early measure before considering replacement.
Insulating an old house should start in unfinished spaces
Insulating an old house is most successful when the work begins where the risk is lowest and the benefit is highest. Preservation guidance consistently points to attics, crawl spaces, basements, ducts, and pipes as the best early targets. These areas typically allow meaningful improvement without removing historic finishes.
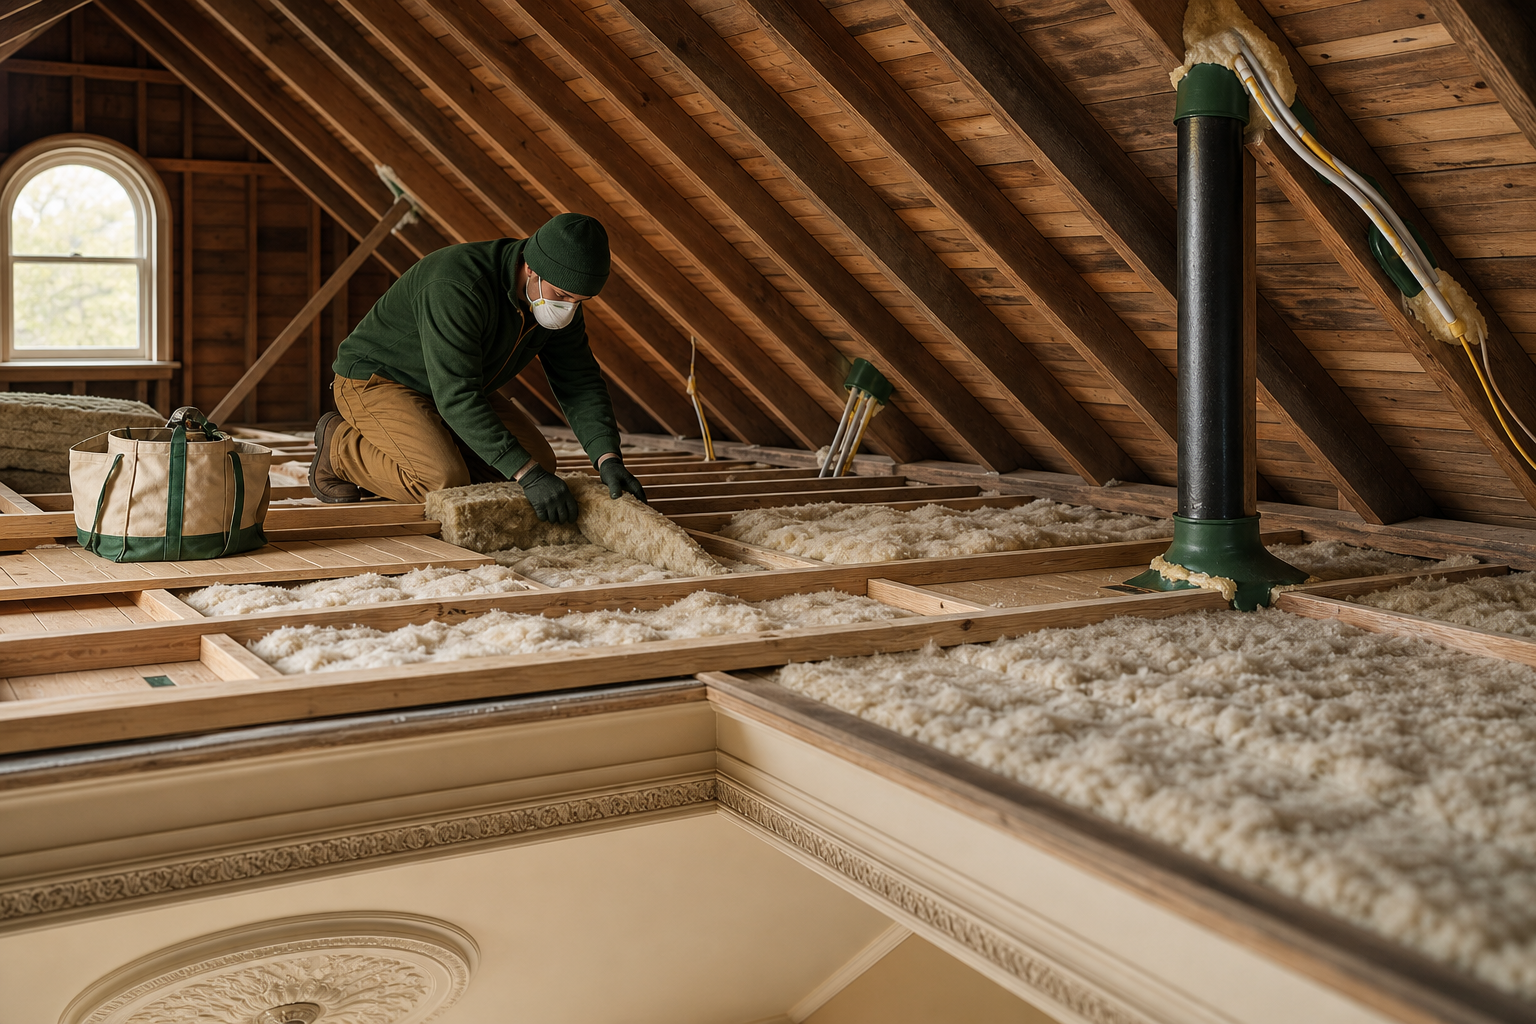
Attics are often the first priority. Warm air rises, and gaps in the attic plane can waste large amounts of energy. The attic should be air sealed before insulation is added, because insulation alone does not stop air movement.
EPA guidance for older homes identifies the attic as one of the easiest and most effective places to insulate, especially below attic floorboards after gaps are sealed. In many Virginia historic homes, this work can be done while leaving intact plaster ceilings and decorative finishes undisturbed.
Attic insulation needs ventilation and moisture control
Attics in older homes can be moist or humid environments. Insulation must be paired with ventilation and moisture management so the thermal barrier performs as intended. If air leaks carry warm, moist indoor air into a cold attic, condensation can become a durability concern.
The best approach is usually to seal penetrations first, then install appropriate insulation in the attic floor or other unfinished attic locations. Eave and ridge ventilation should be maintained or improved when needed. Vapor control should be considered based on the assembly, with guidance generally placing vapor barriers toward the heated space.
This sequencing matters because simply adding insulation over active leaks can hide problems. Air sealing makes the insulation more effective, and ventilation helps the assembly dry safely.
Basements and crawl spaces need moisture work before insulation work
Basements and crawl spaces can provide major energy savings, but they are also common sources of moisture. Before insulating, drainage and ground vapor movement should be addressed. A dirt crawl space, for example, can introduce moisture into the house even when the framing above appears dry.
Preservation guidance recommends moisture barriers on exposed dirt in crawl spaces. It also describes a key decision: whether the basement or crawl space belongs inside or outside the thermal envelope. If it remains unconditioned, insulation is commonly placed between floor joists at the underside of the subfloor, with gaps between conditioned and unconditioned spaces sealed.
Another option is rigid insulation on the interior face of foundation walls, but only after drainage concerns are addressed and joints are carefully sealed. In damp crawl spaces, sealed ground vapor barriers, targeted foundation insulation, vent sealing, and dehumidification may be appropriate. The right choice depends on the existing foundation, moisture levels, and preservation constraints.
Wall insulation in historic homes is often risky and should not be the default
Wall insulation is one of the most misunderstood energy upgrades in historic homes. In newer construction, filling wall cavities is expected. In many historic homes, it can create moisture and preservation problems.
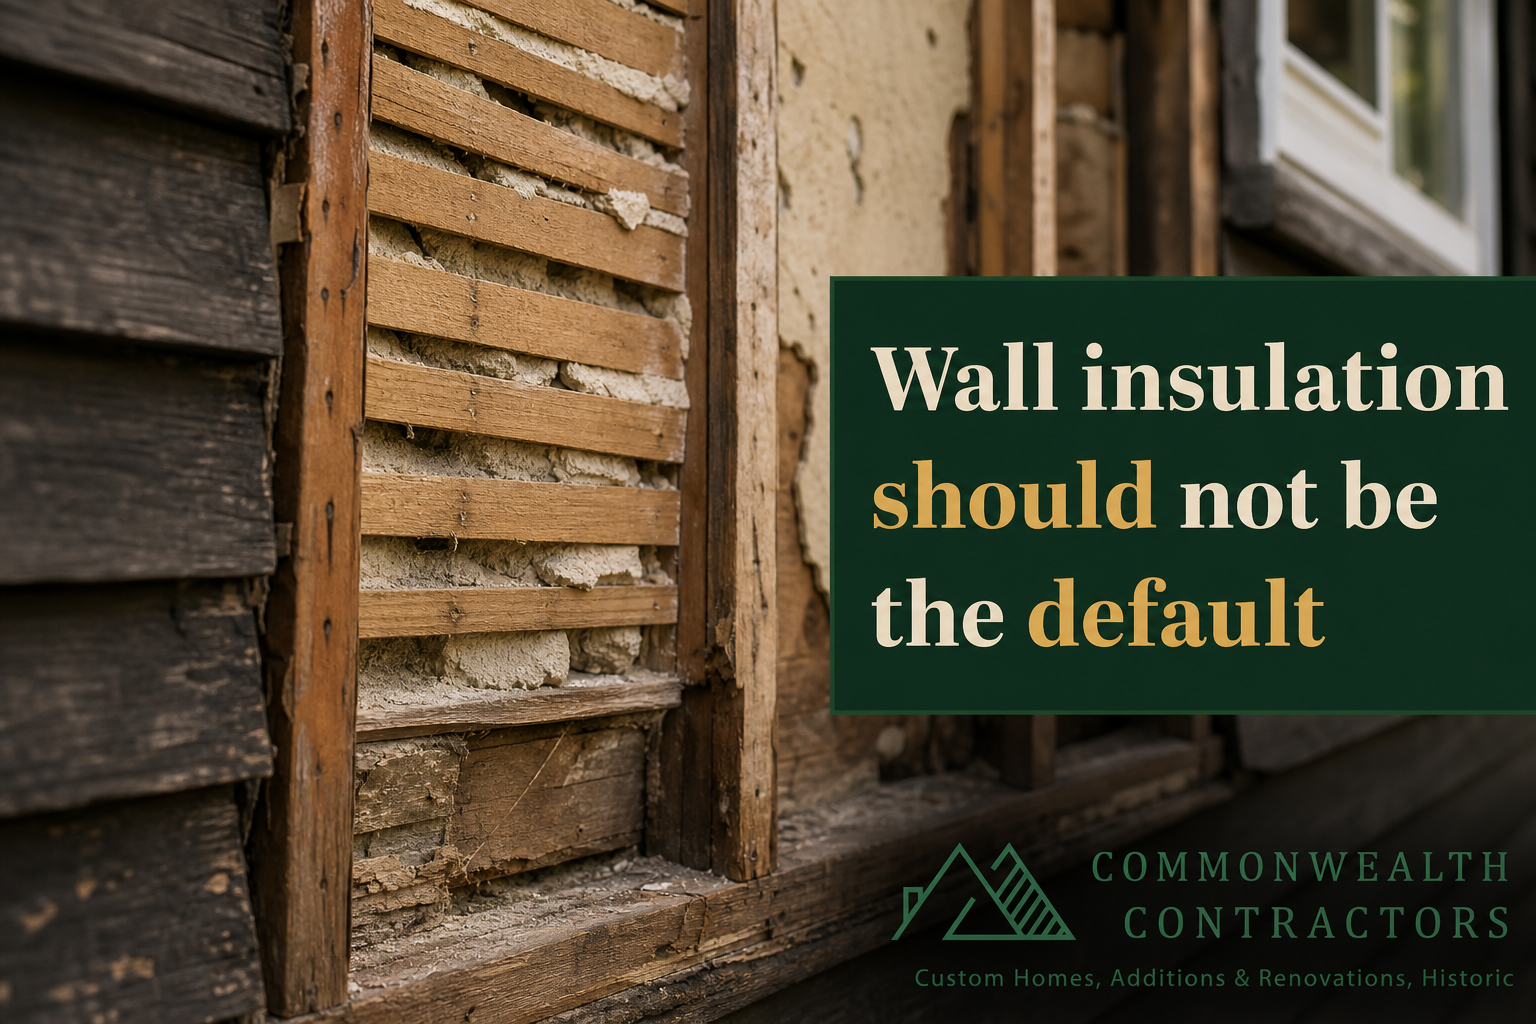
Historic walls may lack the vapor control layers found in modern assemblies. They may include lap siding, masonry, plaster, wood framing, and air spaces that allow drying. Filling those cavities with blown-in or foam insulation can trap moisture and accelerate rot or mold growth, especially where exterior water infiltration exists.
The Historic Fredericksburg Foundation specifically warns that spray foam insulation is not good for historic buildings and stresses that insulation measures should be reversible. This reinforces a broader preservation principle: changes should not permanently damage historic materials or block future repair.
Wall insulation may be appropriate only during major reconstruction
Wall insulation should generally be treated as an exceptional measure. It may be considered when walls are already in severe disrepair, when finishes are being completely replaced, or when a proper moisture barrier and drying strategy can be built into the assembly. Even then, the decision should be made with preservation and moisture risks clearly documented.
If intact historic plaster, trim, paneling, or exterior siding would need to be removed, the energy benefit may not justify the loss. The same is true if the insulation would contact exterior materials that can absorb moisture. In a historic home renovation, the safest path is often to improve attics, basements, crawl spaces, ducts, and windows first, then reassess comfort.
This is one of the places where an experienced renovation team can prevent costly mistakes. Commonwealth Contractors evaluates historic assemblies carefully before recommending intrusive work, particularly where tax credits, local design review, or character-defining materials are involved.
Historic windows can often be upgraded instead of replaced
Windows are one of the first things homeowners notice when thinking about energy efficiency historic homes. Drafts, rattling sash, failing paint, and condensation can make replacement seem like the obvious answer. In a historic house, replacement should usually be the last resort.
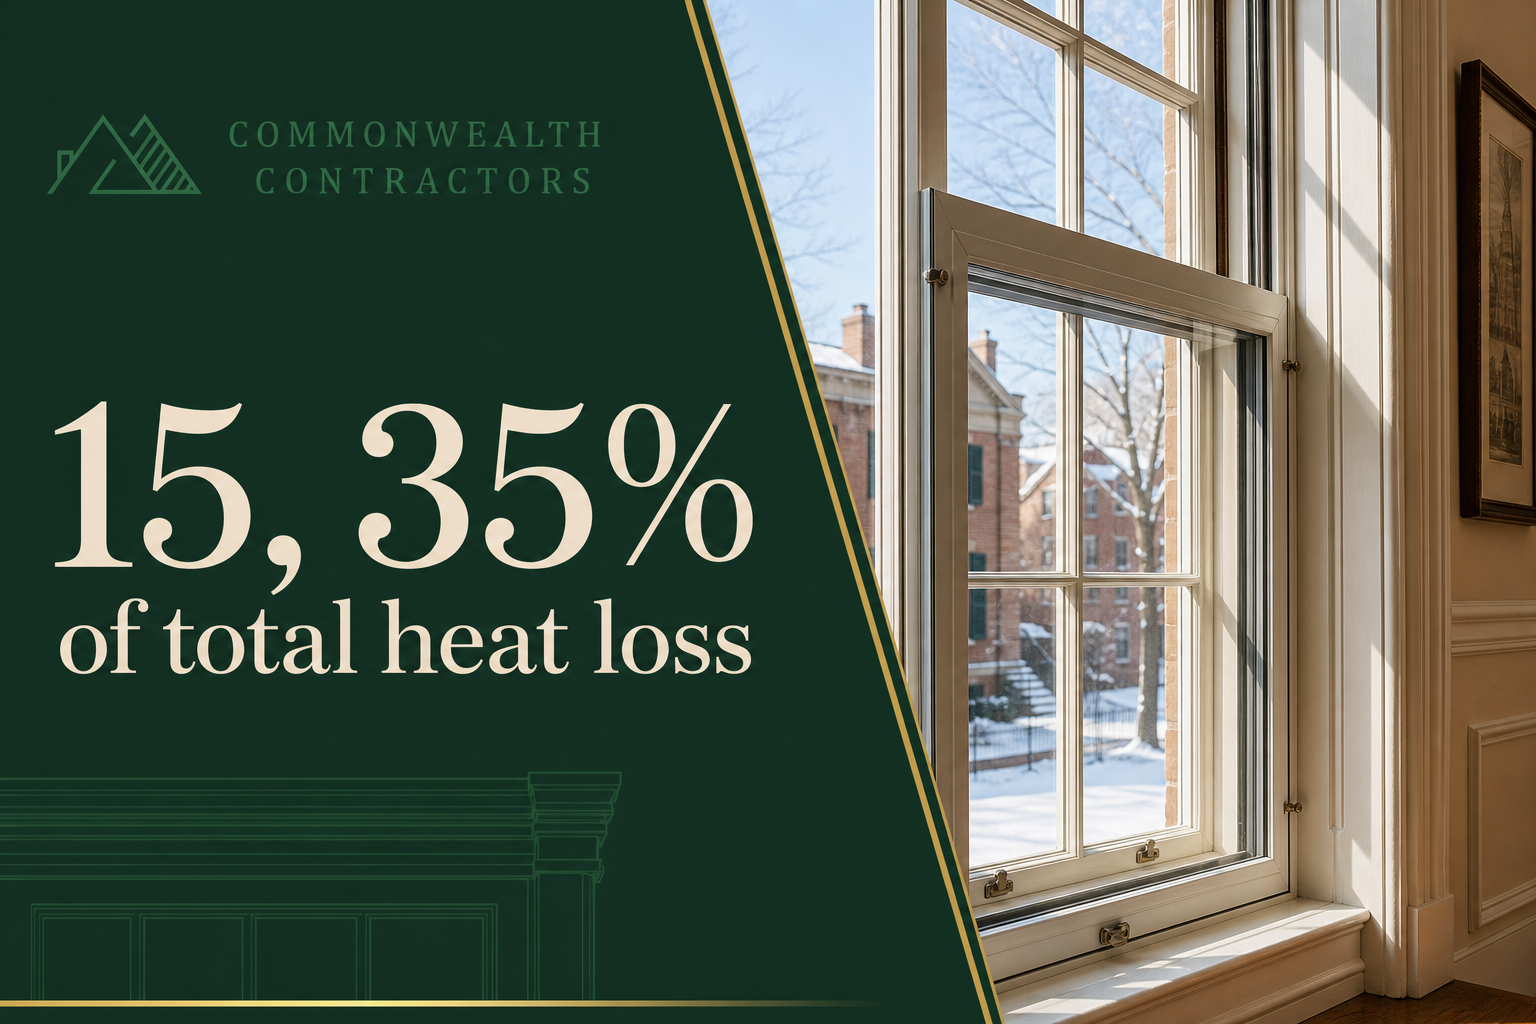
Windows are often character-defining features. Their proportions, muntins, glass, sash depth, trim, and relationship to the wall are part of the building’s identity. Replacing them with units that have different profiles or false muntins can diminish historic character and may affect preservation review or tax credit eligibility.
Research cited in the topic materials estimates that windows in typical northern homes can account for 15, 35% of total heat loss during winter. That is significant, but it does not mean original windows must be discarded. Restoration, weatherstripping, caulking, and storm windows can dramatically improve performance while retaining the historic sash and frame.
Window restoration plus storms is often the preservation-friendly efficiency strategy
A stepwise window strategy starts with repair. Failing paint can be addressed, sash can be repaired, glazing compound can be renewed, and cords and pulleys can be restored. Then weatherstripping and caulking can reduce air infiltration.
Storm windows add another layer of performance while allowing original windows to remain. Exterior storms should be detailed to avoid trapping water, typically sealing the tops and sides while leaving weep holes at the sill. Interior storms may use gaskets, ventilating holes, and removable clips to allow maintenance and reduce condensation risk.
An NPS-referenced study found that a storm over a historic window can achieve thermal performance similar to replacement low-E vinyl windows. Historic New England research also documented meaningful reductions in air infiltration from window conservation, weatherstripping, and storm windows. For many homes, this makes restoration plus retrofit the stronger preservation choice.
HVAC upgrades should follow envelope improvements whenever possible
New HVAC equipment can improve comfort, but it should not be the first move unless the existing system is failing or unsafe. If a historic home is drafty and underinsulated, new equipment may be oversized or forced to compensate for problems that air sealing and insulation could have reduced.
Preservation guidance recommends improving insulation in attics, unheated cellars, and crawl spaces before replacing mechanical equipment. These upgrades can reduce loads on existing systems and may allow future equipment to be smaller and less intrusive. That helps protect historic interiors because oversized ductwork and poorly located equipment can damage important spaces.
When new HVAC is needed, the design should minimize visual and physical impact. Equipment and major ducts should be located in non-character-defining spaces where possible, such as basements, attics, or secondary rooms. Existing chases should be used when appropriate, and new chases should be planned so they do not disrupt important finishes.
Ventilation becomes more important after air sealing and insulation
As a house becomes tighter, indoor air quality and humidity control become more important. Weatherization research found a slight average increase in indoor relative humidity after air sealing and insulation, which shows why ventilation should be part of the plan. Tighter homes need controlled ventilation, not accidental leakage.
High-moisture areas require special attention. Bathrooms, laundries, and kitchens should be vented to the outside. Basements and crawl spaces may also need dehumidification, especially in humid conditions.
Historic-building HVAC literature notes that mechanical ventilation systems can support high indoor air quality, reduce ventilation-related heat losses through heat recovery, and help maintain low indoor humidity during the heating season. For Virginia homes, ventilation and dehumidification should be integrated with the rest of the energy strategy, not added as an afterthought.
Virginia historic home renovation projects should align energy goals with preservation rules
Energy improvements in Virginia historic homes may involve more than construction decisions. Projects can intersect with state and federal preservation standards, local review requirements, building codes, energy codes, and incentive programs. Early planning helps avoid redesign, delays, or work that fails to qualify for available benefits.
The Virginia Historic Rehabilitation Tax Credit provides a state income-tax credit equal to 25% of eligible rehabilitation expenses for certified historic properties. Eligible work can include structural repairs, windows and doors, HVAC, plumbing, electrical, and certain energy-related systems, provided the rehabilitation complies with the Secretary of the Interior’s Standards for Rehabilitation.
Owner-occupied residential projects must meet eligible costs of at least 25% of the building’s pre-rehabilitation assessed value, while income-producing properties must meet a 50% threshold. The process requires certification of significance, proposed rehabilitation, and completed work through the Virginia Department of Historic Resources. The Virginia Department of Historic Resources also provides best-practice stewardship guidance that addresses planning, maintenance, windows, weatherization, insulation, HVAC, and solar.
Energy code flexibility may depend on early coordination
Virginia follows statewide building and energy codes, but historic properties may have alternative compliance paths or flexibility where strict application would damage significant materials. That flexibility is not automatic in every situation. It depends on the property, the jurisdiction, the proposed scope, and the preservation impact.
Early coordination with building officials and preservation reviewers is especially important when projects involve insulation, window work, HVAC routing, or exterior changes. If tax credits are being pursued, coordination with DHR should begin before work is finalized. Energy measures can be compatible with preservation standards, but the design and documentation need to support that compatibility.
A practical priority order for energy efficiency in historic homes
Every historic house is different, but the order of operations matters. Jumping to visible, expensive interventions can miss the biggest sources of energy loss. A phased plan allows the homeowner to make improvements, measure results, and decide whether more intrusive work is truly needed.
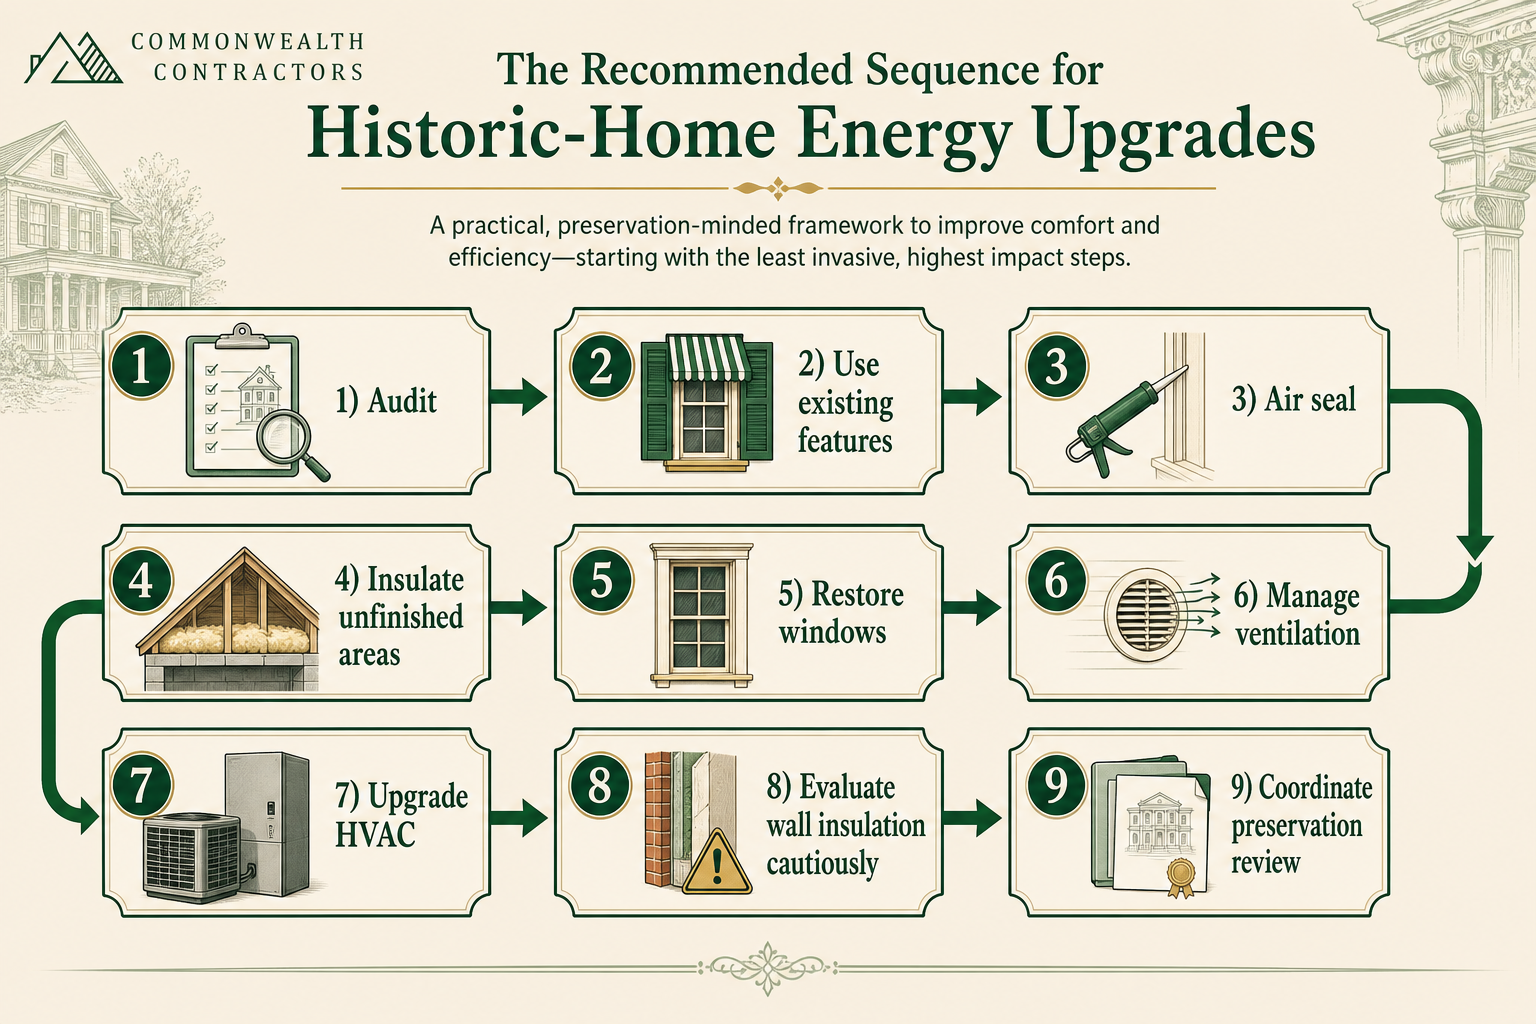
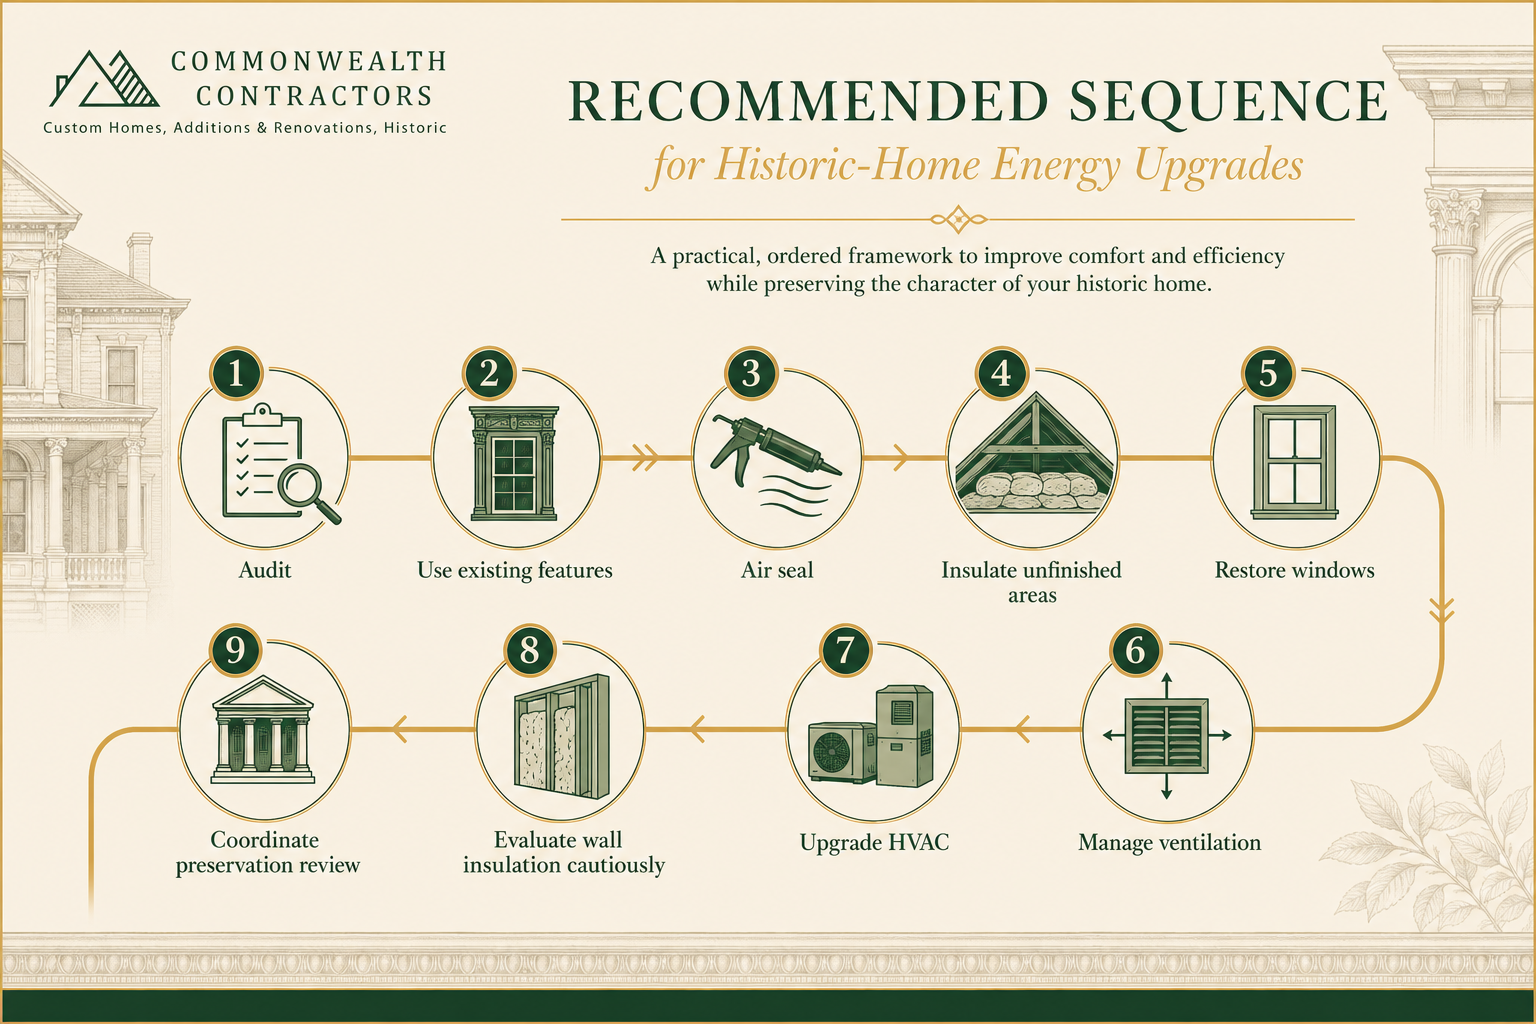
The best first-dollar improvements are usually the ones that address air movement, attic losses, foundation moisture, window drafts, and duct leakage. These upgrades often preserve historic character while improving comfort. More invasive work, such as wall insulation or major mechanical reconfiguration, should come later and only after risk analysis.
This priority order gives homeowners a practical framework. It is not a substitute for an audit or preservation review, but it reflects the sequence recommended across the research provided. It also helps keep historic home renovation work focused on durability as well as energy savings.
Start with an energy audit and blower door test
Identify actual leakage points, heat loss areas, duct issues, and current performance before choosing upgrades.
Use existing energy-saving features
Maintain operable windows, shutters, awnings, vents, shading, and natural ventilation strategies already built into the home.
Air seal the biggest leaks first
Focus on attics, foundations, sill plates, service penetrations, chimneys, crawl spaces, doors, windows, and duct leaks.
Insulate unfinished areas before finished walls
Prioritize attics, basements, crawl spaces, ducts, and pipes because these areas usually offer strong benefit with lower preservation risk.
Restore windows before replacing them
Repair sash and frames, renew glazing, add weatherstripping, improve caulking, and consider interior or exterior storm windows.
Address ventilation and humidity
Vent bathrooms, kitchens, and laundries outside, monitor indoor humidity, and consider balanced or heat-recovery ventilation where appropriate.
Upgrade HVAC after reducing loads
Plan equipment size, duct routes, condensate paths, and ventilation so modern comfort does not damage historic interiors.
Evaluate wall insulation only with caution
Avoid foam or blown-in insulation in vulnerable historic wall assemblies unless the wall is being rebuilt with proper moisture control.
Coordinate preservation review and incentives early
Confirm whether tax credits, DHR review, local approval, or alternative code compliance paths affect the scope.
Energy performance and historic character can support each other
The strongest energy plan for a historic home is measured, phased, and respectful of original materials. It begins with testing, not guessing. It improves the building envelope where risk is lowest. It treats moisture management as part of energy efficiency, not a separate issue.
Air sealing, attic insulation, crawl space moisture control, window restoration with storms, duct sealing, and thoughtful HVAC design can make a historic home more comfortable without erasing the details that make it worth preserving. The most important discipline is knowing when not to intervene. Sometimes the best renovation choice is repair, maintenance, and a reversible upgrade rather than replacement.
If you are planning energy efficiency improvements as part of a historic home renovation in Virginia, Commonwealth Contractors can help you evaluate the right sequence and scope. Schedule a Consult at https://www.commonwealthcontracts.com/contact-us or call (434) 218-0448 to discuss your project.


.webp)
.webp)
.webp)


.webp)
.webp)

.webp)
%2520(1).webp)
%2520(2).webp)


.webp)
.webp)
.webp)
%2520(1).webp)
%2520(3)%2520(1).webp)
%2520(1)%2520(1).webp)
.webp)
%2520(1).webp)
%2520(2)%2520(1).webp)